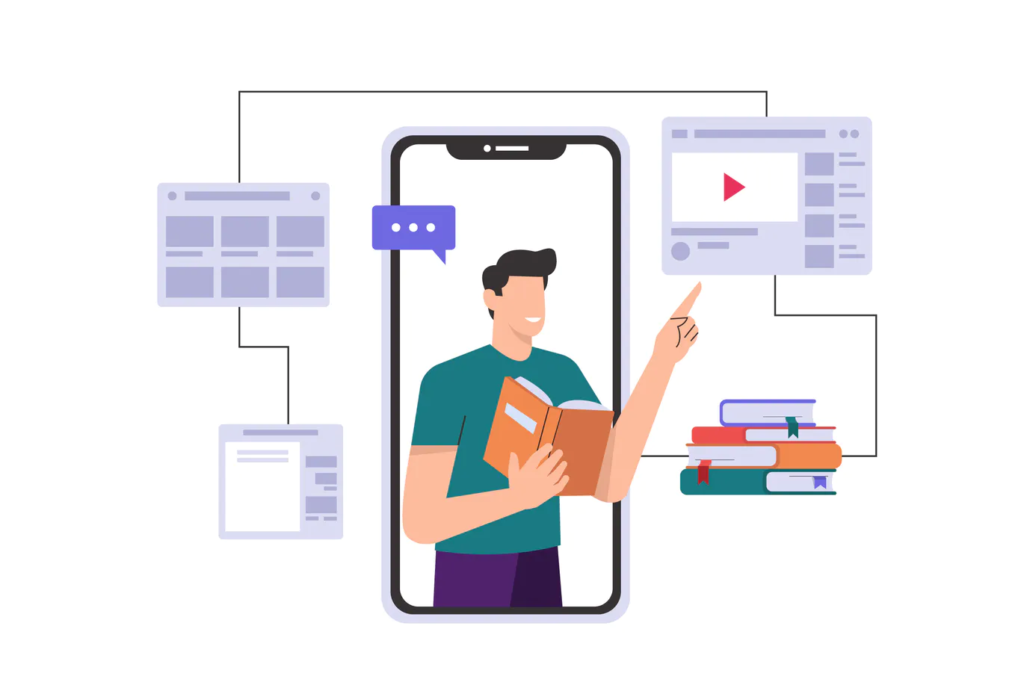
Online learning is not just an alternative to traditional education anymore. Due to the pandemic, most institutions are now relying on online classes. Schools and universities are relying on websites and apps to deliver classes and content to students.
School websites and apps are thus quite common now. A report from Statista suggested that as many as 81% of college students in the US believe that digital learning has helped improve their grades.
Institutions are thus evolving with this change too. There has been a concerted effort to adopt new technologies into education. Building websites and apps is an example of the same trend.
Creating school apps is not easy. Schools have their own unique requirements when it comes to mobile apps. Development can take time and is often quite expensive.
A better way to create a school app is to use your WordPress website. Codeless app creators basically allow WordPress site owners to build mobile apps without worrying about programming. Essentially, these tools convert WordPress websites into mobile apps.
In this article, we discuss how you can use these automated tools to make a school app using a WordPress website.
#1: Choose an app creator for your website
Let’s assume you already have a school website built with WordPress. The next step is choosing an app creator for your school website.
There are many factors to consider while making this choice. The following points highlight some of them:
- Website-app sync: It is important to ensure that your website content is synced to the app automatically. Otherwise, you would be stuck adding content to the app every time you update your website. You should choose a tool that automates this part of the process and syncs your school website’s course content to the app.
- Turnaround time: One of the main reasons website owners use automated tools is to speed up the development process. Make sure the platform you use has a short turnaround time so that you can quickly create a school app.
- Essential features: While running a school website on WordPress, you must be using LMS plugins to offer courses within the website. Make sure the app creator you use supports LMS plugins. This is to ensure your course content is synced to the app.
- Affordability: Another advantage of using these tools is affordability. Creating an app from scratch requires a lot of investment. App creators reduce the risk of starting an app by lowing the level of investment needed.
Once you’ve chosen a tool, the next logical step is to start making an app. For the purposes of this article, we will use AppMySite to demonstrate how to create an app for your school website.
#2: Design your app’s icon, launch screen, and more
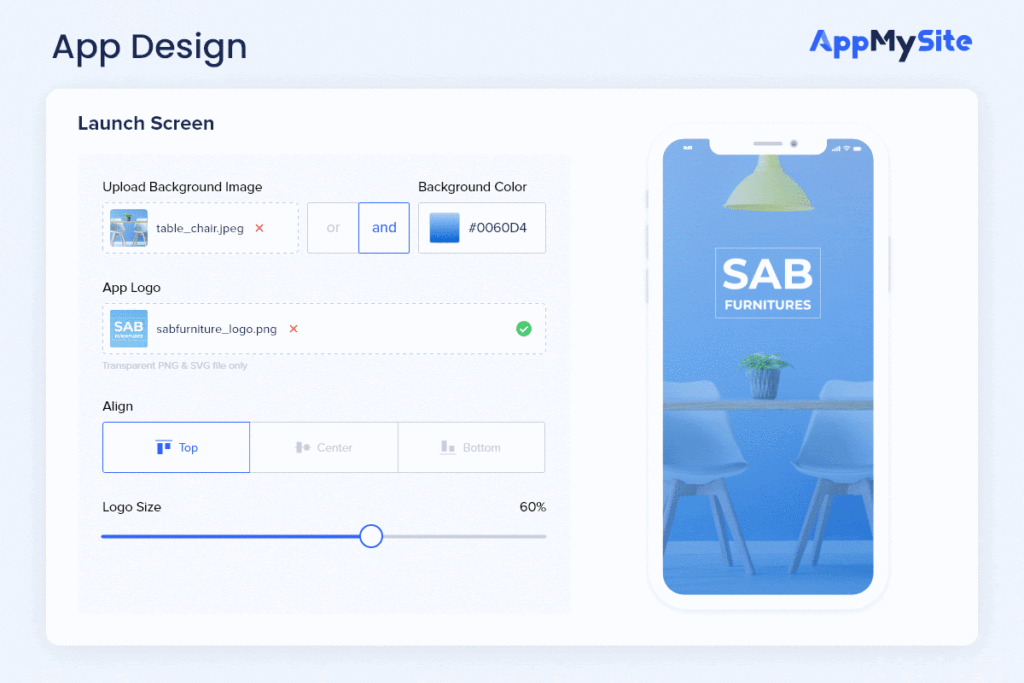
After completing the initial steps of signing up and entering some basic app details, you can get started with designing your app.
The first thing you think about while starting work on your app is how it will look in the end. On AppMySite, you can thus start with creating the essential graphic assets of your mobile app. This includes your app’s icon, launch screen, onboarding screens, and more.
The following points highlight the crucial assets and screens you can design:
- App icon: Create an icon for your app using the options available or upload your own design.
- Launch screen: Consists of a background and a logo. You can upload your own designs for both or use the design tools available.
- Onboarding: Similar to launch screen in terms of the design options available. You can also set a color scheme for the fields and buttons on the screen.
- Color theme: Choose a color theme for the overall app. This will be reflected on all the app screens. You can basically choose a color for your app header and button here.
- Home screen: Choose the arrangement and design of each section on the home screen. You can also choose which sections to make visible, and preview every change on the live screen.
#3: Connect your school website and app
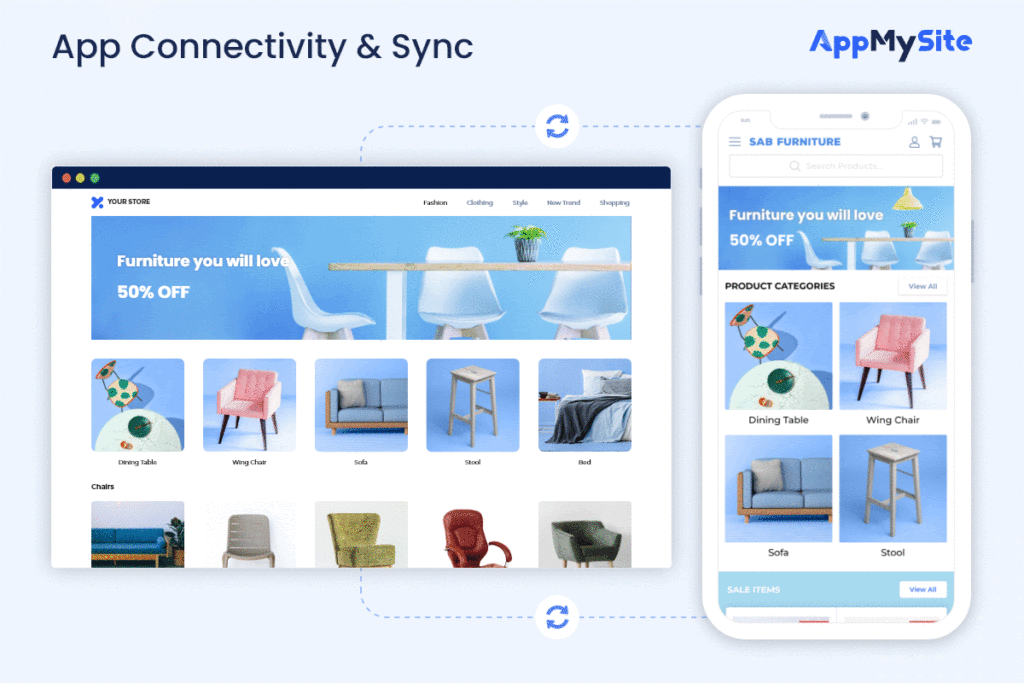
Next, you need to connect your WordPress website and app. This step ensures your website content is synced to the app automatically.
In the following steps, you can learn how to establish connectivity between your website and app:
- Install plugin: Install and activate the AppMySite plugin on your WordPress website.
- Connect API: Generate WordPress Application Password in the Profile module of your website’s backend. Verify plugin installation and enter the application password details in your AppMySite account to complete the connection.
Once the connection is complete, your app will start reflecting your website’s content. Any updates you make to the content of your website will also be synced to the app. This allows you to keep your app updated and populated at all times.
The content that is synced from your website to the app includes your website’s posts, pages, categories, and menus. If you’re using the WooCommerce plugin on your website, your products and product categories will be synced to the app as well.
#4: Sync custom posts to your app
If you have a school website, you probably use an LMS plugin to offer course content on it. These plugins enable you to create custom posts for your course content. The custom posts can be synced to the app and shown as courses.
Thus, a large part of building a school app is to sync custom posts from your website to the app. You simply need to add these custom posts to the primary menu of your WordPress website. Once you sync your primary menu to the app, your custom posts will appear in the app as well.
You can choose to show these posts in either native or webview. This option is available in the Posts section of your AppMySite account. In case your custom posts aren’t being rendered properly in the native view, enabling the webview is a viable option.
Besides LMS plugins, you can sync other custom posts as well. AppMySite supports custom post types and taxonomies, which means all the custom content created by your plugins can be synced to the app.
Thus, if you have a church app or a dating website that is built with a third-party plugin, you can create an app using the platform.
#5: Test and download
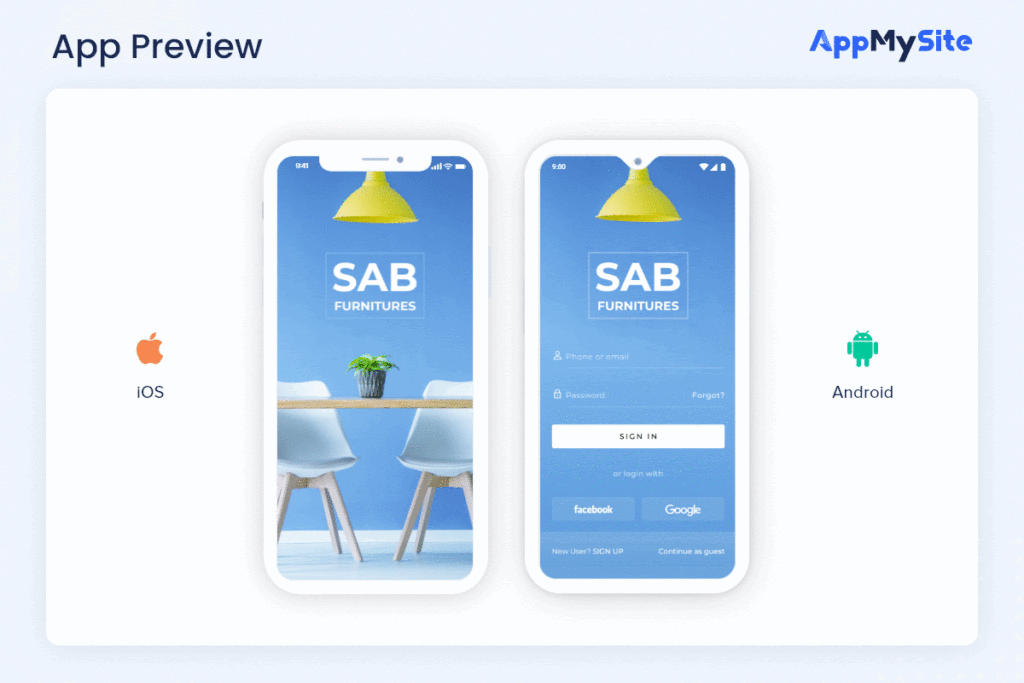
You can preview and test the entire app you build on AppMySite. When you’re done, you can preview your app on live Android and iOS emulators. These emulators enable you to preview how your app looks and works. You can test every app screen and see if it is working as intended.
If there are areas that need changes and improvements, you can go back and make the necessary changes.
Besides running your app on emulators, you can also preview it on a real mobile device. AppMySite enables you to test your app on a real smartphone device as well. You can simply download the AppMySite demo app from the Google Play Store and preview your app’s working on a real device.
Alternatively, you can download the APK of your app and test it thoroughly before publishing it to the app stores.
Once you’ve tested your app, it is time to publish it. You would need Apple and Google developer accounts to submit your app to the app stores.
In conclusion
Creating a school app is a common aspiration for institutions with a simple website. Even though building an app can be challenging, automated tools make the task much easier.
According to a report, retention rates with online learning increase by 25-60%. Traditional learning on the other hand has retention rates as low as 8-10%. It is thus crucial to develop a website and app that streamlines learning and makes it easy for students to learn. In this article, we discuss how to make a school app using a WordPress website. To create the perfect app, you need to ensure that the platform you use is ideal for developing a mobile app.